Multi-framing
Puesta de marco múltiple
& Didier
Leboutte
Traducción en castellano de Docteur Christophe
Aquí viene el ejemplo utilizado en este tutorial.
1) Open the stereo
1) Abrir la estéreo
Open AnaBuilder, and drag & drop the image file to open it. You should get a stereo anaglyph in AnaBuilder's main panel. You should get a stereo anaglyph in AnaBuilder's main panel.Abrir AnaBuilder, y arrastrar y soltar el fichero de la imagen para abrirlo. Debes obtener una estéreo anaglifo en el panel principal de AnaBuilder.

2) Create the first frame
2) Creación del primer marco
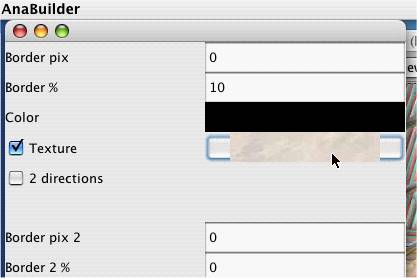
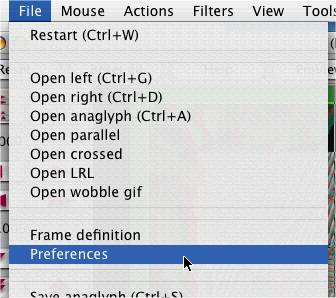
Open the Frame definition tool.Abrir la herramienta "Fichero / definición de un marco".

Enter border width : "Border % = 10" so that the created border will be 10% of the image size. Click on the "Texture" checkbox, so that this border will not be a single color, but a texture. Then, click on the button at right containing a display of the current texture, and select the first texture in the texture browser.
Entrar la anchura del borde: "Borde%=10" de modo a crear un borde de 10% del tamaño de la imagen. Luego, haz clic en el botón de la derecha que pone la textura actual y seleccionar la primera textura en el navegador de texturas.
|

|
Click on the "Preview" button at the bottom of the border tool to have a look at the result you will obtain, using the StereoBee viewer. You can zoom in/out, view as anaglyph, parallel or crossed. You can also set the window as full screen. Close the StereoBee when you are ok.
Haz clic en el botón "Previsualización" abajo de la herramienta marco para echar un vistazo al resultado que vas a obtener usando el vizualizador StereoBee. Se puede hacer zoom o zoom atrás, ver como anaglifo, paralelo o cruzado. Se puede poner la ventana en pantalla completa. Cerrar el StereoBee cuando estás OK.

3) Create the second frame
3) Crear el segundo marco
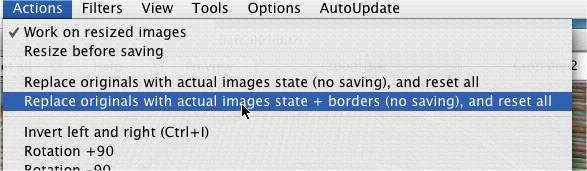
Validate this first frame choice on the edited image by using the menu "Actions / Replace originals..+ borders..". You should get the new stereo with the frame added.Validar esta opción de primero marco en la imagen editada usando el menú "Acciones / Remplazar los originales ..+ bordes..". Debes obtener una nueva estéreo con el marco añadido.

Click 1 time on the "fast move to left" button (
Haz clic 1 vez en el botón "desplazamiento rapido izquierdo" (

|
|
Puedes hacer clic en el botón "Previsualización" como antes.
4) Red/Cyan desaturation (optional)
4) Desaturación Rojo/Cian (facultativo)
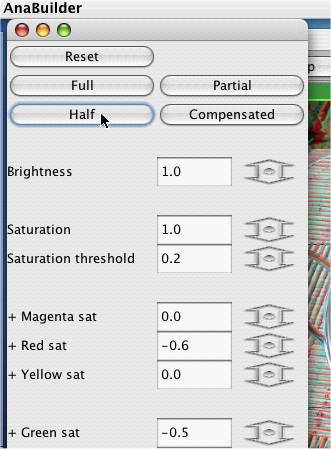
As this stereo is a bit red and green, it is not really comfortable to view as anaglyph. If you would like to build a better anaglyph you should desaturate it. Validate the framing as at the beginning of section 3, updating the working image. After this validation, on the border panel, also click on the "Default" button to reset all values, to avoid adding twice the frame at the saving step. Now clik on the menu "Filters / Sat6 filter", and choose a preset filtering configuration, for example "Half".Ya que esta estéreo está un poco roja y verde, no resulta cómoda de ver en anaglifo. Validar la puesta en marco como al principio del paso 3 mediante la actualización de la imagen de trabajo. Después de esta actualización, en el panel de definición de marcos, haz clic en el botón "Por defecto" para restaurar todos los valores y no volver a añadir un segundo marco en el paso de almacenamiento. Ahora, haz clic en el menú "Filtros / Filtro Sat6" y elegir una configuración de filtro predefinida, por ejemplo "Medio".

|
|
5) Saving
5) Almacenamiento
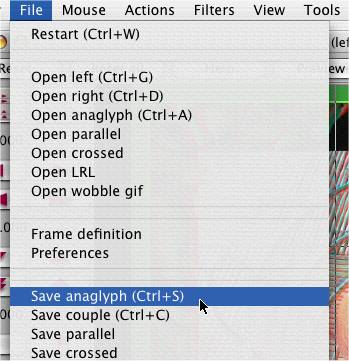
To get a much better anaglyph, open the Preferences panel and check the better quality checkboxes. Also set a JPG compression rate depending on the file size you want. Para obtener un mejor anaglifo, abrir el panel de preferencias y activar las casillas para una mejor calidad. Definir también el nivel de compresión JPG en relación con el tamaño de fichero que quieres obtener.

Ask to save as anglyph, and give a name.
Activar el almacenamiento como anaglifo, y dar un nombre.

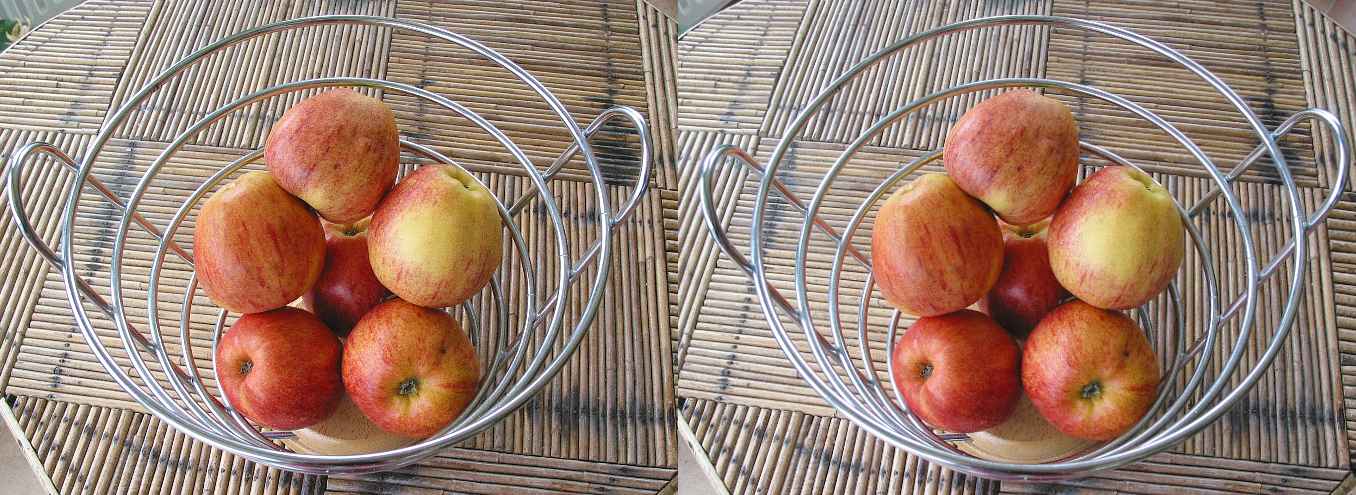
Here is my result.
Aquí está mi resultado.
